Router · Ubiquiti
UniFi gateway login, restart, updates and UPnP
UniFi gateways run UniFi OS with the UniFi Network application built in. You manage them in a browser, locally or through Site Manager at unifi.ui.com, or in the UniFi app.
- Sign in
unifi.ui.comorunifi- App
- The UniFi app (iOS and Android)
- Password
- There is no password on a label. You choose the admin credentials, usually a UI Account, in the setup wizard. Local-only setups use the username
adminwith the password you set. - Models
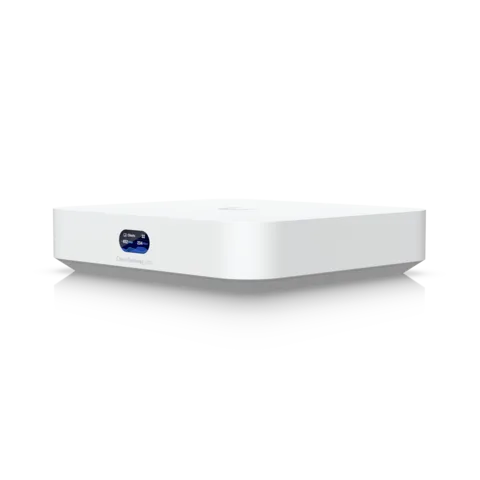
- UniFi Cloud Gateway Ultra, UniFi Cloud Gateway Max, UniFi Dream Machine Pro, UniFi Dream Router, UniFi Express
Sign in to the UniFi
Remotely, sign in with your UI Account at Site Manager. On the home network you can go to the gateway directly.
Join the gateway’s Wi-Fi or plug the Mac in with Ethernet.
Open
unifi/in a browser, or the gateway’s IP address shown on its screen.Accept the browser’s privacy warning; the console uses a self-signed certificate.
Sign in with your UI Account or local admin credentials.
If you can’t find the address, open the WiFiman app and look in Discovery.
If you have lost the admin login, hold the Reset button for 5–10 seconds while the console is powered. This erases all settings. An Owner can also use Factory Reset in the UniFi OS system settings.
Restart it properly
Open UniFi OS in a browser and go to the console’s own Settings › Advanced.
Click Restart Console under Console Controls.
Wait a few minutes for UniFi OS and the network to come back.
A short press of the Reset button reboots the console, but holding it longer factory resets it or starts recovery mode. Use the menu instead.
Schedule a restart
Ubiquiti’s help centre documents no scheduled restart for UniFi consoles.
Update the firmware
Open Site Manager at
unifi.ui.comor the UniFi app and select Update Manager.Update the console, its applications and devices from there.
For automatic updates, open the site and go to Settings › Control Plane › Updates.
Select the console or application, then pick the release channel and auto-update schedule.
Official is the stable release channel; Early Access gets test releases. Updates for access points and switches live in the UniFi Network settings.
See connected devices
Open UniFi Network and select Clients in the sidebar.
Select a client to see its details, signal strength and the access point it uses.
For DHCP leases, go to Settings › Networks and select IP Leases next to the network.
Connect it to Kilobat
Kilobat Pro reads clients from UniFi Network’s local Integrations API and traffic from its older controller statistics API, when the console permits it.
On Network 9.3 or later, create an API key in Settings › Control Plane › Integrations.
At home, open Kilobat’s Tools › Devices › Connect your router and choose UniFi.
Enter its local HTTPS address and the API key.
Compare the certificate fingerprint with the certificate shown in your browser on the console before choosing Trust and Connect.
For an older console, choose a local account instead. Client counters can include local-network transfers and are not internet-only totals. If the older statistics API does not answer, Kilobat reports that limit instead of inventing per-device usage. The key or password stays in this Mac’s Keychain. Connection details and limits.
UPnP and port forwarding
Open UniFi Network and go to Settings › Internet.
Turn on UPnP and apply the change.
UPnP lets any app on your network open and forward ports through the firewall without asking. Ubiquiti recommends keeping it off unless something needs it, even for gaming. If a manual port forward fails, UPnP may already be holding that port.
NAT-PMP
Ubiquiti’s help centre does not document a NAT-PMP option; its UPnP article covers only UPnP.
Prioritise calls and gaming
In Network 9.4, go to Settings › Policy Table › Create New Policy › QoS.
In 9.3, it is Settings › Policy Engine › QoS › Configure.
Choose Prioritize, Limit or Prioritize and Limit.
Pick the source device or network and the destination app or category, such as Zoom.
Click Add; the rule takes effect at once.
QoS rules turn off hardware offloading, which can cut top speeds above 1 Gbps. Smart Queues, for connections under 300 Mbps, limits all traffic to set upload and download speeds to curb bufferbloat.
2.4 and 5 GHz, and the channel
UniFi uses one SSID across bands by default, with Band Steering nudging devices to 5 GHz.
Go to Settings › WiFi and select your network.
Under WiFi Band, tick only the bands this SSID should use.
To split bands, create a second WiFi with the other band and its own name.
Leave Band Steering on unless a device struggles with it.
Change the channel
Go to UniFi Devices, select the access point or gateway, and open Settings.
Set the channel and width for each radio and apply.
Or open AirView › Radios › Channel AI View, click Optimize, then Apply Changes.
Mesh: which node a device uses
A UniFi Express can be the gateway or a wireless mesh access point. Other UniFi access points can mesh too.
Go to Settings › WiFi and turn on Wireless Meshing.
In UniFi Devices, select the wireless access point and turn on Mesh Connect in Settings.
Turn on Mesh Parent on the wired access point it should connect to.
Open Clients and select a device to see which access point it is on.
Ubiquiti suggests no more than two wireless hops and at least −60 dBm between a mesh point and its parent. BSS Transition in the WiFi settings helps devices roam.
Guest network
Go to Settings › Networks and create a network for guests.
Turn on Network Isolation so it can’t reach your other networks.
Go to Settings › WiFi, create a WiFi and assign it the guest network.
Turn on Client Device Isolation so guests can’t see each other.
Optionally turn on Hotspot Portal for a captive portal sign-in page.
DNS settings
Go to Settings › Internet and open DNS Server.
Enter the resolvers you want, for example
1.1.1.1, and apply.To hand a different DNS server to one network’s devices, open Settings › Networks and select the network.
Under DHCP Service Management, set DNS Server.
By default UniFi uses the provider’s DNS. Devices pick up a DHCP change when their lease renews; reconnect them to apply it sooner.
Connection status and logs
Open the UniFi Network Dashboard to see whether the internet connection is up.
Click the Logs icon in the left-hand sidebar.
Filter by the Internet category to see outages, failovers, high latency and packet loss.
Select an entry for its details.
Manuals and downloads
Links go to the maker’s own pages.
Questions
Why does Site Manager say the connection is slow?
That figure is about remote management, not your internet speed. Ubiquiti lists VPNs, double NAT behind a provider router, and DNS blocking of ui.com as common causes.
Can I use UniFi behind my provider’s router?
Yes, but you get double NAT, and port forwarding and UPnP may not work from outside. Ubiquiti recommends giving the gateway a public IP, for example with the provider box in bridge mode.
Sources
- Ubiquiti Help Center: UniFi Local Management
- Ubiquiti Help Center: How to Set Up UniFi
- Ubiquiti Help Center: How to Reset UniFi Devices to Factory Defaults
- Ubiquiti Help Center: Recovering and Troubleshooting UniFi Talk Installations (Restart Console)
- Ubiquiti Help Center: UniFi Updates
- Ubiquiti Help Center: UniFi Gateway - UPnP
- Ubiquiti Help Center: UniFi Gateway - Port Forwarding
- Ubiquiti Help Center: UniFi QoS and Traffic Shaping
- Ubiquiti Help Center: UniFi Gateway - Smart Queues
- Ubiquiti Help Center: UniFi WiFi SSID and AP Settings Overview
- Ubiquiti Help Center: Maximizing Wireless Speeds
- Ubiquiti Help Center: UniFi Channel AI and Automated WiFi Optimization
- Ubiquiti Help Center: Considerations for Optimal Wireless Mesh Networks
- Ubiquiti Help Center: Best Practices: Guest WiFi
- Ubiquiti Help Center: UniFi - DNS Troubleshooting Guide
- Ubiquiti Help Center: UniFi System Logs & SIEM Integration
- Ubiquiti Help Center: Site Manager Connection Speed
Checked on 1 November 2026.
See what your router can’t tell you
Kilobat is a Mac menu-bar app that watches the network from your side: which app is using it, whether the Wi-Fi, the router or the provider is slow, and why a call froze.
brew install seifip/kilobat/kilobat