Router · ASUS
ASUS router login, restart, firmware and UPnP
ASUS RT, ROG Rapture, TUF Gaming and ZenWiFi routers all run ASUSWRT. You manage them in a browser or in the ASUS Router app, and several can join into one AiMesh system.
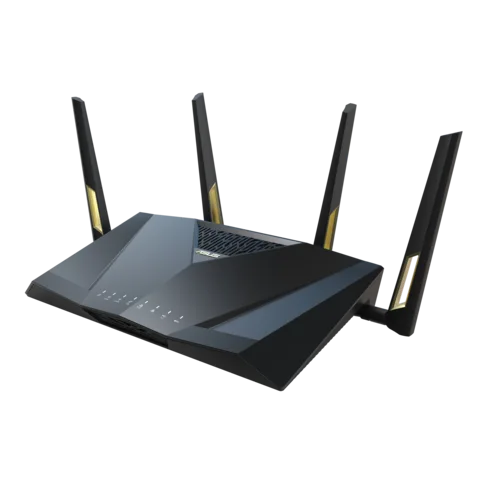
- Sign in
www.asusrouter.comor192.168.50.1- App
- The ASUS Router app (iOS and Android)
- Password
- You create the login name and password the first time you set the router up. Some models print a login on the label on the back or underside.
- Models
- RT series, ROG Rapture, TUF Gaming, ZenWiFi, AiMesh systems
Sign in to the ASUS router
Factory default. On some older models the label shows admin as both the default username and password. ASUS asks you to replace it with a long password of more than 10 characters.
Connect your Mac to the router by Ethernet or Wi-Fi.
Open
http://www.asusrouter.comor the router’s LAN IP, such ashttp://192.168.50.1, in a browser.Enter the router login name and password, then click Sign In.
This login is not your Wi-Fi password or your provider account. If you forget it, the only fix is a factory reset: hold the reset button for at least 5 seconds until the power light flashes. That erases all settings. If you close the browser without logging out, wait three minutes before signing in from another computer.
Restart it properly
Sign in to the web interface.
Click Reboot at the top of the page.
Click OK. The router restarts at once and devices lose internet for a few minutes.
A restart keeps your settings. The schedule relies on the router’s clock, so it only works when the router is online and its time zone is right.
Restart from the app
Open the ASUS Router app and tap Settings › System Settings.
Tap the Reboot icon, then OK.
Schedule a restart
Go to Administration › System.
Set Enable scheduler reboot to Yes.
Pick the days and a time of day (24-hour clock), then click Apply.
In the app, the same switch is under Settings › System settings › Schedule Reboot.
Update the firmware
In the ASUS Router app, tap Settings › Firmware Upgrade › Check Firmware Version and accept the update.
Or, in the web interface, go to Administration › Firmware Upgrade.
Turn on Auto Firmware Upgrade and choose a time when nobody is using the network.
If the router can’t reach the ASUS server, download the firmware for your exact model from ASUS, unzip it and click Upload.
Don’t turn the router or any AiMesh node off during an update; each one restarts by itself when done. ASUS marks some releases as required, and the router installs those automatically.
See connected devices
Open Network Map and click the Clients icon in the middle.
The Client status list on the right shows Online, Wired and Wireless devices.
Click a device to see its IP address, MAC address, signal strength and access time.
In the app, tap Devices at the bottom.
Phones and laptops that use a private (random) Wi-Fi address may show as Unknown or with a vague name. You can rename them in the device details.
UPnP and port forwarding
Go to WAN › Internet Connection.
Set Enable UPnP to Yes or No.
Click Apply.
UPnP lets apps and games on your network open ports on the router by themselves. That helps consoles and video calls, but a compromised device can use it too. If nothing needs it, leave it off and forward ports by hand under WAN › Virtual Server / Port Forwarding. Forwarding only works when your provider gives the router a public WAN IP.
NAT-PMP
ASUS documents no separate NAT-PMP switch. Its guide to turning NAT-PMP off says to set Enable UPnP to No and also turn off WAN › Port Trigger and WAN › Virtual Server / Port Forwarding.
Prioritise calls and gaming
ASUS offers Adaptive QoS on most models and Adaptive QoE on newer firmware. Only one QoS type can be on at a time.
Click Adaptive QoS in the left menu.
Turn on Enable QoS and set the QoS type to Adaptive QoS.
Pick a mode such as Games and click Apply.
To set your own order, click Customize, drag the categories and click Save.
Adaptive QoE on newer firmware
Click Adaptive QoE in the left menu.
Choose AI Balance, Gaming, Streaming, WFH or Office, then click Apply.
Limit one device
Open Adaptive QoS and choose Bandwidth Limiter as the QoS type.
Add the device, set upload and download caps below your plan’s speed, then click Apply.
2.4 and 5 GHz, and the channel
Smart Connect gives every band one Wi-Fi name and moves devices between bands. ASUS has two menu layouts, split at firmware 3.0.0.6.102_35404.
On newer firmware, go to Network › Main network profile.
Tick every band to merge them, or keep one band ticked to split it off. Click Apply.
To give another band its own name, click Add Network, set a name and password, and pick the band.
On older firmware, go to Wireless › General and switch Enable Smart Connect on or off.
Change the channel
Go to Wireless › General and choose the band.
For 5 GHz, untick Auto select channel including DFS channels first.
Pick a Control Channel instead of Auto and click Apply.
The ASUS Router app can’t change the channel; only the web interface can. Available channels depend on your country.
Mesh: which node a device uses
AiMesh joins several ASUS routers or ZenWiFi units into one network. The first router, connected to the modem, is the AiMesh router; the others are nodes.
Click the AiMesh icon on Network Map to list the nodes, with each node’s device count and signal to the router.
Go to AiMesh › Topology to see which node each device is on.
Select a node in the middle column to list its clients on the right.
To pin a device to one node, click Bind next to it, choose the node and click OK.
Binding needs firmware 3.0.0.4.386 or later and isn’t available on ZenWiFi AC (CT8) or AC Mini (CD6). A bound device still moves to another node if its signal drops too far.
Guest network
Click Guest Network in the left menu.
Choose the band for the guest network. A name and password are generated for you.
Change the name, password or Access time if you like, then click Apply.
In the app, go to Settings › WiFi › Wireless Settings › Guest Network and tap +.
Guests get their own subnet. Access Intranet is off by default, so guests can’t reach your devices. Newer models call this Guest Network Pro or Self-Defined Network. On AiMesh, only the first guest network on each band can reach the nodes.
DNS settings
Go to WAN › Internet Connection.
Under WAN DNS Setting, click Assign next to DNS server.
Pick a resolver from the list, or choose Manual Setting and enter a primary and secondary address.
Click OK, then Apply. The internet drops briefly.
This is the method for firmware 3.0.0.4.388 and later. Older firmware has the DNS fields directly on the same page.
Connection status and logs
On Network Map, click the Internet icon to see Internet status, the WAN IP and DNS servers.
Go to System Log › General Log for the system time, uptime and event log.
Click Save to download the log as
syslog.txt.
Log entries dated 5 May usually mean the router hadn’t synced its clock, often because it was offline. A factory reset clears the log.
Manuals and downloads
Links go to the maker’s own pages.
Questions
Why doesn’t the ASUS Router app show the Wi-Fi channel?
ASUS only lets you pick the control channel in the web interface. Use Wireless › General in a browser.
Should I reset the router after a firmware update?
ASUS recommends a factory reset after a manual update if the router misbehaves. It erases your settings, so note your Wi-Fi and internet details first.
Sources
- ASUS Support: How do I enter my ASUS router’s setting page using Web GUI?
- ASUS Support: How to Reboot your ASUS Router?
- ASUS Support: How to set up an ASUS router to automatically restart at specific times
- ASUS Support: How to update the firmware of your router to the latest version (WebGUI)
- ASUS Support: How to update the firmware via ASUS Router App
- ASUS Support: How to check the information of devices connected to ASUS router?
- ASUS Support: How to disable NAT-PMP from ASUS Router?
- ASUS Support: Introduction and settings of QoS on ASUS Router
- ASUS Support: How to Set Up Adaptive QoE and Bandwidth Limitation on ASUS Routers
- ASUS Support: How to configure the Smart Connect in ASUS Router?
- ASUS Support: How to fix wireless Control Channel?
- ASUS Support: Where can I find client list of AiMesh node?
- ASUS Support: How to bind my device to one specific AiMesh router or AiMesh node?
- ASUS Support: How to set up Guest Network on ASUS Router?
- ASUS Support: How to manually assign WAN DNS server to ASUS router?
- ASUS Support: How to save System Log in my ASUS router?
Checked on 1 November 2026.
See what your router can’t tell you
Kilobat is a Mac menu-bar app that watches the network from your side: which app is using it, whether the Wi-Fi, the router or the provider is slow, and why a call froze.
brew install seifip/kilobat/kilobat