Router · TP-Link
TP-Link Archer login, restart, firmware and UPnP
TP-Link Archer routers share one web interface at tplinkwifi.net. You can also manage most of them in the TP-Link Tether app, and some newer features live only in the app.
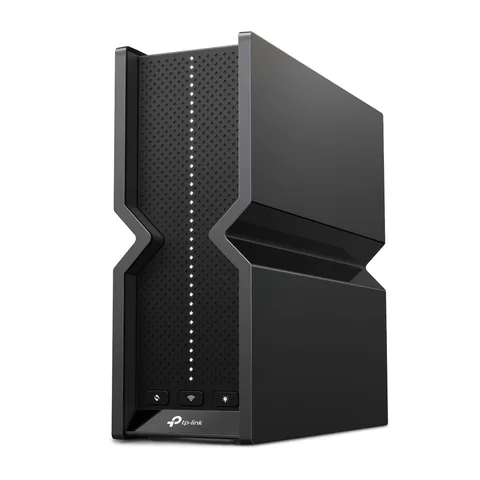
- Sign in
tplinkwifi.netor192.168.0.1- App
- The TP-Link Tether app (iOS and Android)
- Password
- Newer models ask you to create your own admin password on first login. If you later bound the router to a TP-Link ID, you sign in with that account instead. The Wi-Fi name and password printed on the router’s label are only for joining the network.
- Models
- Archer BE series, Archer AXE series, Archer AX series, Archer C series, Archer A series, Archer GX90
Sign in to the TP-Link Archer router
Factory default. Some older models use admin as both the default username and password. Change it to your own password straight away under Advanced › System › Administration.
Connect your Mac to the router by Ethernet or Wi-Fi.
Type
tplinkwifi.netor192.168.0.1in the browser’s address bar, not a search box.If the browser shows a privacy warning, click Advanced and continue. The router uses a self-signed certificate.
Enter your admin password or TP-Link ID and sign in.
If tplinkwifi.net won’t load, turn off any VPN or proxy and try the IP address. Forgot the password? Click Forgot password if you use a TP-Link ID or set up password recovery. Otherwise hold the Reset button about 6 seconds until the power light blinks. That erases all settings.
Restart it properly
Sign in to the web interface.
Go to Advanced › System › Reboot.
Click REBOOT. Devices lose internet for a few minutes.
A restart keeps your settings. On some models the reboot page is under Advanced › System Tools › Reboot.
Schedule a restart
Go to Advanced › System › Reboot.
Tick Enable next to Reboot Schedule.
Set the Reboot Time and how often it should Repeat.
Click SAVE.
The schedule follows the router’s clock. Check the time zone under Advanced › System › Time & Language first.
Update the firmware
Go to Advanced › System › Firmware Update. Some models call it Firmware Upgrade.
Turn on Auto Update, pick an Update Time and save.
To update now, click CHECK FOR UPDATES, then UPDATE if a new version appears.
In the Tether app, tap More › System › Firmware Update, then Update.
Online updates need a TP-Link Cloud model. For others, download the file for your exact hardware version (shown on the label as “Ver”) from TP-Link’s site for your region, and upload it under Local Update over Ethernet. Don’t power off the router during an update. Read the release notes: some updates reset settings, so back up first under Advanced › System › Backup & Restore.
See connected devices
Sign in and open Network Map.
Click Clients to list every device on your network.
From the list you can block a device or set a Speed Limit for it.
Click Mesh Devices to see any extenders or satellite routers.
UPnP and port forwarding
TP-Link routers support UPnP. It is on by default on most models, though TP-Link says some ship with it off.
Sign in to the web interface.
Go to Advanced › NAT Forwarding › UPnP.
Toggle it on or off.
UPnP has no password: any app on your network can ask the router to open a port, including malware. TP-Link’s advice is to turn it off if you don’t need it, keep the firmware current and check the router’s UPnP table for ports you don’t recognise. Forward ports by hand under Advanced › NAT Forwarding › Port Forwarding instead.
NAT-PMP
TP-Link’s guides don’t mention NAT-PMP. UPnP is the only automatic port-opening switch.
Prioritise calls and gaming
Archer QoS gives chosen devices more bandwidth for a set time when the line is busy. Where it lives depends on the model.
Go to Advanced › QoS › Device Priority. Some models only offer Application Priority.
Click the edit button and set the total bandwidth to your plan’s speed.
Toggle Priority on for a device.
Click its Timing entry to choose how long it stays prioritised.
On HomeShield models, such as the Archer AX73, QoS is in the Tether app under the HomeShield tab instead. Older models without HomeShield or HomeCare use Advanced › QoS › Settings with priority rules.
2.4 and 5 GHz, and the channel
With Smart Connect on, 2.4 and 5 GHz share one Wi-Fi name and devices are moved to the best band.
Go to Advanced › Wireless › Wireless Settings.
Switch Smart Connect on to merge the bands.
Untick it to give each band its own name and password, then click SAVE.
Change the channel
Go to Advanced › Wireless › Wireless Settings.
Pick a Channel for the band instead of Auto.
Leave Channel Width at its default unless you have a reason to change it.
Click SAVE.
TP-Link recommends Auto unless your Wi-Fi drops out intermittently.
Mesh: which node a device uses
Many Archer routers can form a mesh with compatible TP-Link extenders or routers. Older models use OneMesh; newer ones use EasyMesh.
Go to Advanced › EasyMesh (or Advanced › OneMesh) and turn it on.
Click ADD SATELLITE DEVICES and follow the steps, or press WPS on the router and extender within 2 minutes.
Open Network Map › Mesh Devices to see the satellites and their clients.
Not every model supports mesh, and some need a firmware update first. TP-Link keeps a compatibility list for OneMesh devices.
Guest network
Go to Advanced › Wireless › Guest Network.
Tick Enable for the 2.4 GHz or 5 GHz guest network and set a name.
Choose a Security type and password, then click SAVE.
Click Share Network to show the name and password to guests.
Under Guest Permissions, leave Allow guests to access your local network unticked so guests can’t reach your devices. Some models also offer a speed limit and an Effective Time for the guest network.
DNS settings
Go to Advanced › Network › Internet.
Open Advanced Settings and choose Use the following DNS addresses. Some models show the fields directly.
Enter a Primary DNS and Secondary DNS, then click SAVE.
Restart the router under Advanced › System › Reboot so the change takes effect.
Connection status and logs
Open Network Map and click Internet for a quick status check.
For detail, go to Advanced › Network › Status. It shows the connection type, WAN IP, gateway and DNS servers.
Go to Advanced › System › System Log and click SAVE TO LOCAL to download the log.
To test the line, use Advanced › System › Diagnostics to ping or trace a host.
If the IP address and DNS show blank or 0.0.0.0, the router has no internet connection from your modem or provider.
Manuals and downloads
- TP-Link Archer BE550 user guide (PDF)
- TP-Link Wi-Fi Router User Guide (For Web)
- TP-Link Archer AX73 online user guide
- Firmware downloads
Links go to the maker’s own pages.
Questions
Why can’t I sign in with my Wi-Fi password?
The web interface uses a separate admin password, or your TP-Link ID if you bound the router to one. The Wi-Fi password on the label only joins the network.
Do I need the Tether app?
Not for most settings, but HomeShield features such as its QoS and parental controls are only in the app. Uploading a firmware file by hand needs the web interface.
Sources
- TP-Link Support: How to Log In to Your TP-Link Router
- TP-Link: Wi-Fi Router User Guide (For Web)
- TP-Link Support: How to Update Firmware on TP-Link Wi-Fi Routers
- TP-Link Support: TP-Link UPnP: What It Is and How to Enable It
- TP-Link Support: How to Change DNS Settings on a TP-Link Router
- TP-Link Support: How to set up QoS using TP-Link Wi-Fi Router
- TP-Link: Archer AX73 V1 User Guide, Chapter 15 Manage the Router
- TP-Link: Archer AX73 V1 User Guide, Chapter 9 HomeShield
- TP-Link: Archer AX73 V1 User Guide, Chapter 10 OneMesh with Seamless Roaming
Checked on 1 November 2026.
See what your router can’t tell you
Kilobat is a Mac menu-bar app that watches the network from your side: which app is using it, whether the Wi-Fi, the router or the provider is slow, and why a call froze.
brew install seifip/kilobat/kilobat