Provider box · Nokia
Nokia WiFi Beacon login, Nokia WiFi app, UPnP and port forwarding
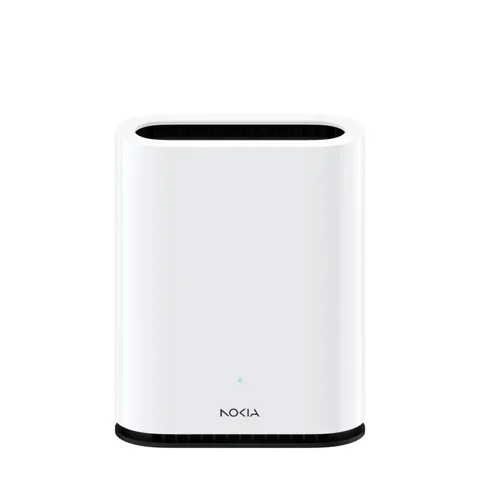
Nokia WiFi Beacons are mesh Wi-Fi points that internet providers hand out; Nokia sells them only through providers. You manage them in the Nokia WiFi app, with a web interface at http://192.168.18.1 for a few extra settings.
- Sign in
- The Nokia WiFi app or
192.168.18.1 - App
- Nokia WiFi (iOS and Android)
- Password
- The admin username (
admin) and password, plus the Wi-Fi name and key, are on the sticker of the root Beacon, the one connected to your modem. Some providers also let you create a Nokia WiFi account with your email. - Models
- Beacon 6, Beacon G6, Beacon 24, Beacon 19, Beacon 10, Beacon 9, Beacon 4, Beacon 3.1, Beacon 2, Beacon 1.1, Beacon G3.1
Sign in to the Nokia WiFi Beacon
Connect your phone to the Beacon’s Wi-Fi and open the Nokia WiFi app.
Tap Get Started and scan the QR code on the root Beacon, or enter its details by hand.
Create an account if your provider offers one; otherwise sign in with the admin details from the sticker.
For the web interface, open
http://192.168.18.1orhttp://www.webgui.nokiawifi.comand sign in asadmin.
Some providers need https:// instead; accept the browser’s warning about the self-signed certificate. Change the admin password in the app under Settings › Account, or in the web interface under Maintenance › Password. Nokia can’t recover it: a forgotten password means a factory reset of every Beacon.
Restart it properly
Unplug the Beacon’s power, or switch it off.
Plug it back in. The light is solid white while it boots.
Wait for it to turn blue-green (or blue), meaning the connection is good.
The small recessed Reset button is not a restart. Holding it for about 10 seconds, until the light flashes red, erases all settings, and Nokia says every Beacon in the network must then be reset, starting with the root one.
Schedule a restart
Nokia documents no scheduled restart, and no restart button in the app.
Update the firmware
Leave the Beacons plugged in; Nokia updates them automatically.
Updates install at 3 am local time by default.
You always get the latest firmware your provider has approved. Nokia says the update time can be changed in the app’s settings but doesn’t name the screen.
See connected devices
Tap Devices at the bottom of the app’s home screen.
The Connected tab lists online devices; Not connected lists those seen in the last 15 days.
Tap a device to see which Beacon it uses, its band, signal, MAC and IP address.
Tap the edit icon to rename it, or the menu icon and Block to keep it off your Wi-Fi.
Blocking or unblocking a device drops the whole network for a couple of minutes.
Pause internet with family profiles
Tap Profiles at the bottom, then Create New.
Name the profile and pick its devices.
Pause or unpause it at any time, or set schedules and a bedtime.
UPnP and port forwarding
Nokia Beacons support UPnP, switched in the app. Nokia’s help centre doesn’t say whether it is on by default and doesn’t mention NAT-PMP.
Tap Settings at the bottom of the app’s home screen.
Swipe down and tap Advanced.
Turn UPnP on or off, and tap Enable to confirm.
Nokia warns that UPnP can open ports on the router without authentication, which may expose your network to outside threats. Turn it on only for devices that need it, such as a games console.
Port forwarding
Tap Settings › Advanced › Port Forwarding, then Create a rule.
Pick a device, or tap Add Manually, and confirm its reserved IP address.
Enter the external and internal ports and choose TCP & UDP, TCP or UDP.
Tap the check mark to save.
To forward a range of ports, use the web interface. Port forwarding, DNS settings and family profiles are unavailable when the Beacons run in bridge mode.
Prioritise calls and gaming
Nokia’s help centre documents no QoS or device priority for the Beacons.
2.4 and 5 GHz, and the channel
By default one network covers every band and moves devices between them. For an older device that struggles, add a single-band network.
In the web interface, go to WiFi › WiFi networks and click Add WiFi network.
Choose 2.4GHz, 5GHz or 6GHz instead of Multiband.
Give it a name and password and save.
Some providers also let you add a network in the app: tap Settings, then + next to Add WiFi network. The network goes down for two minutes while it changes.
Change the channel
Nokia suggests this only when support asks you to, and says to return to Auto afterwards.
Sign in to the web interface with the details on the root Beacon’s sticker.
Select Network, then Wireless 2.4 GHz & 5 GHz.
Pick a channel and click save; on 2.4 GHz, Nokia recommends 1, 6 or 11.
Later, set the channel back to Auto and click save.
Mesh: which node a device uses
Every Beacon after the first extends the mesh, over Wi-Fi or an Ethernet cable. Extra Beacons must come from the same provider.
Tap Network at the bottom of the app.
On the WiFi Points tab, tap Add Wi-Fi point.
Use the app’s location test to check a spot, then plug the Beacon in and follow the steps.
For a wired link, connect its blue WAN port to a LAN port on another Beacon.
If an extender’s light stays red, connect it to the root Beacon’s yellow LAN port by cable for at least an hour, then move it back. Device details show which Wi-Fi point each device uses.
Guest network
Where your provider offers it, the guest network is off by default and keeps guests away from your own devices. Its default password is 12345678, so change it.
Tap the toggle on the guest network card on the app’s home screen.
Tap the card, then the edit icon, to change the name, password or Expires time.
Tap the check mark to save. The network goes down for two minutes.
Tap the share icon to send the details by text message or email.
DNS settings
Tap Settings, swipe down and tap Advanced.
Tap DNS and choose Custom.
Enter a Primary DNS and, optionally, a Secondary DNS.
Tap the check mark to save.
Connection status and logs
Check each Beacon’s light. Blue-green is good, yellow poor, red bad or not connected.
On the home screen, tap Check on the network health card for tips.
Tap New speed test under Internet Speed to test the root Beacon’s connection.
If the internet is down, plug a computer straight into your modem to see whether the provider is at fault.
The speed test and health check aren’t offered by every provider. Help and Support in the app can share the app’s logs with support.
Manuals and downloads
Links go to the maker’s own pages.
Questions
Where is the Nokia Beacon password?
On the sticker of the root Beacon: the admin username and password, and the Wi-Fi name and key. Nokia can’t recover a changed admin password; you’d have to factory reset.
Can I buy another Beacon in a shop?
No. Nokia sells Beacons only through internet providers, customised for each one, so a Beacon from another provider or the used market won’t join your network.
Do I need to update the firmware?
No. Updates install automatically, by default at 3 am, with the latest version your provider has approved.
Sources
- Nokia WiFi Help Center: Logging into the web GUI
- Nokia WiFi Help Center: Sign in with admin credentials
- Nokia WiFi Help Center: Web GUI, connecting with HTTPS
- Nokia WiFi Help Center: Set up your Nokia WiFi
- Nokia WiFi Help Center: Factory reset a Nokia WiFi device
- Nokia WiFi Help Center: Understanding the LED colors
- Nokia WiFi Help Center: FAQ
- Nokia WiFi Help Center: Device details
- Nokia WiFi Help Center: Set up family profiles (parental controls)
- Nokia WiFi Help Center: Enable / Disable UPnP
- Nokia WiFi Help Center: Set up port forwarding
- Nokia WiFi Help Center: Add a WiFi network (new SSID)
- Nokia WiFi Help Center: How to change the WiFi channel
- Nokia WiFi Help Center: Extend your network coverage by adding a Beacon
- Nokia WiFi Help Center: Fixing issues with backhaul connection (red LED)
- Nokia WiFi Help Center: Guest Network
- Nokia WiFi Help Center: Change DNS settings
- Nokia WiFi Help Center: Check Network Health
- Nokia WiFi Help Center: Where can I purchase Nokia WiFi Beacons?
Checked on 1 November 2026.
See what your router can’t tell you
Kilobat is a Mac menu-bar app that watches the network from your side: which app is using it, whether the Wi-Fi, the router or the provider is slow, and why a call froze.
brew install seifip/kilobat/kilobat