Router · GL.iNet
GL.iNet router login, restart, firmware updates and UPnP
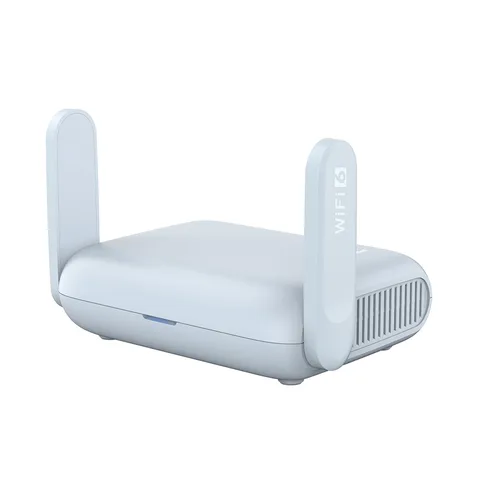
GL.iNet makes small travel routers such as Beryl AX and Slate 7, and home routers such as Flint 2. They run GL.iNet’s own firmware on OpenWrt; you manage them in a browser at http://192.168.8.1 or in the GL.iNet app.
- Sign in
192.168.8.1- App
- GL.iNet app (iOS and Android)
- Password
- There is no factory admin password: you create one the first time you open the Admin Panel. The Wi-Fi name and Wi-Fi key are on the label underneath, with a QR code. GL.iNet says some older models without a key on the label use
goodlifeas the Wi-Fi key. - Models
- GL-MT3000 (Beryl AX), GL-BE3600 (Slate 7), GL-MT6000 (Flint 2), GL-BE9300 (Flint 3), GL-AXT1800 (Slate AX), GL-X3000 (Spitz AX), GL-MT2500 (Brume 2)
Sign in to the GL.iNet router
Connect your Mac to the router’s Wi-Fi, or to a LAN port with an Ethernet cable.
Open
http://192.168.8.1in Chrome, Edge or Safari.The first time, set an admin password and click Next, then set up Wi-Fi.
Afterwards, sign in with that admin password.
To change it later, go to SYSTEM › Admin Password; you need the current one.
Forgotten it? Once the router has fully started, hold the reset button for 10 seconds. That restores factory settings and erases all your data. If 192.168.8.1 won’t load, try a private window and switch off any VPN on your Mac.
Restart it properly
GL.iNet’s docs describe no restart button in the Admin Panel, only power and the reset button.
Unplug the router’s power cable.
Wait 30 seconds, then plug it back in.
Wait for it to boot, then open
http://192.168.8.1to check it’s back.
Repair the network without a full restart
Wait until the router has fully started.
Press and hold the reset button for 4 seconds, then release.
This restarts the network interface and resets the internet settings, but keeps Wi-Fi, VPN and system settings. Holding for 10 seconds is a full factory reset.
Schedule a restart
Sync the clock first under SYSTEM › Time Zone.
Go to SYSTEM › Scheduled Tasks.
Turn on Schedule Reboot, set the time and the days, and click Apply.
If the router is off at the scheduled time, the restart is skipped.
Update the firmware
Sign in and go to SYSTEM › Upgrade.
Under Online Upgrade, check the current version and install the newest one offered.
To install a file instead, download it from the GL.iNet download centre for your model.
Upload it under Local Upgrade, leave Keep Settings on and click Install.
Keep the power on; the router restarts by itself. If an online upgrade says Download Failed, sync the clock under SYSTEM › Time Zone. Don’t tick Keep Settings when downgrading.
See connected devices
Sign in and click CLIENTS in the left menu.
Read each device’s name, connection type, IP and MAC address, speed and traffic.
To rename a device, click the three-dot icon under Action, then Modify.
To cut a device off, use the block control in its row.
To reserve an address, use the Reserved IP column (firmware v4.8 and later).
Blocking works by MAC address. Many phones use a randomised one, so a blocked phone may return with a new address.
UPnP and port forwarding
UPnP arrived in firmware v4.11. Mappings last 7 days by default.
Sign in and go to SECURITY › UPnP.
Toggle the switch to enable UPnP.
Active mappings appear with the device, protocol, ports and remaining Lease.
Click the trash icon to delete a mapping, or Refresh for the latest list.
GL.iNet warns that any device or app on the network can open ports without asking, so a compromised device can expose itself to the internet. Enable UPnP only on trusted networks and turn it off when you don’t need it. For direct connections from the internet, GL.iNet says UPnP requires a public WAN IP. Behind another router, incoming connections also require appropriate forwarding on the upstream router.
Port forwarding
Go to SECURITY › Port Forwarding (or NETWORK › Port Forwarding before v4.9).
Click Add in the Port Forwarding section.
Choose the protocol and external port, then the device’s Internal IP and port.
Click Apply.
NAT-PMP
GL.iNet’s docs don’t mention NAT-PMP or a separate switch for sharing status over UPnP.
Prioritise calls and gaming
QoS arrived in firmware v4.9 on Beryl AX, Flint 2, Slate 7 and newer models; older models like Slate AX don’t have it.
Go to FLOW CONTROL › QoS and toggle QoS on.
Enter your upload and download speeds in Mbps, or click Run Speedtest.
Choose Device Priority and click Add Device for your Mac.
Or choose Application Priority, then Customize › Pre-Set up, and drag categories higher.
Click Apply.
QoS can’t run alongside SQM, and turning it on switches Network Acceleration off. In v4.9 and v4.10 there is only application priority.
2.4 and 5 GHz, and the channel
The main network broadcasts on every band at once, each with its own settings.
Sign in and click WIRELESS.
Under Main Network, click the gear icon next to a band (2.4, 5 or 6 GHz).
Give that band its own SSID and password if you want to split them.
Click Apply and reconnect your devices.
Change the channel
In WIRELESS, click the gear icon next to the band.
Choose a channel, and a bandwidth if needed.
Click Apply.
Wi-Fi 7 models can also add an MLO Wi-Fi network across two or more bands.
Mesh: which node a device uses
Mesh arrived in firmware v4.10 on Flint 2, Flint 3, Slate 7 and Beryl AX. One main router manages up to eight nodes.
Put the new node next to the main router and power it on.
On the node’s Admin Panel, go to MESH and click Mesh Node.
On the main router, connect to the internet, then go to MESH › Main Router.
Click Start Scanning, or use Ethernet Backhaul, to add the node.
Afterwards, click any node on the MESH topology to see its clients and uptime.
Once added, a node is managed only from the main router.
Guest network
Sign in and click WIRELESS.
Under Guest Network, click Add.
Choose the bands, a name and a password, then click Apply.
For more options, go to NETWORK › Guest Network.
The guest network uses its own subnet, 192.168.9.1 by default. AP Isolation keeps guests apart; Block WAN Subnets stops them reaching an upstream network.
DNS settings
On firmware v4.11 DNS has its own menu; on v4.10 and earlier it is NETWORK › DNS.
Sign in and click DNS.
Under Manual DNS, choose Static DNS and enter up to four servers.
Or choose Encrypted DNS, a provider, and DoT, DoH or DoQ.
Click Apply.
By default VPN traffic uses the VPN’s DNS; turn on Apply Manual DNS to VPN tunnels to change that. DNS rebinding protection, under Options, can break hotel captive portals.
Connection status and logs
Sign in and click INTERNET.
A solid green line means connected; a white line with a yellow mark means connected but no internet.
For logs, go to SYSTEM › Log and filter the System Log by level or keyword.
Click Export Log to save it for GL.iNet support.
SYSTEM › Overview shows CPU load, memory and temperature.
Manuals and downloads
Links go to the maker’s own pages.
Questions
What is the default GL.iNet admin password?
There isn’t one. You choose it the first time you open http://192.168.8.1. The label holds only the Wi-Fi name and key.
Why can’t I find UPnP?
It is under SECURITY › UPnP from firmware v4.11. Update under SYSTEM › Upgrade.
Sources
- GL.iNet Docs: First time setup
- GL.iNet Docs: Admin Password
- GL.iNet Docs: Cannot access web Admin Panel
- GL.iNet Docs: Repair network or reset
- GL.iNet Docs: Stuck on “Rebooting” during firmware reboot
- GL.iNet Docs: Scheduled Tasks
- GL.iNet Docs: Upgrade
- GL.iNet Docs: Clients
- GL.iNet Docs: UPnP
- GL.iNet Docs: Port Forwarding
- GL.iNet Docs: QoS
- GL.iNet Docs: Wireless
- GL.iNet Docs: Mesh
- GL.iNet Docs: Guest Network
- GL.iNet Docs: DNS (firmware v4.11)
- GL.iNet Docs: Internet
- GL.iNet Docs: Log
Checked on 1 November 2026.
See what your router can’t tell you
Kilobat is a Mac menu-bar app that watches the network from your side: which app is using it, whether the Wi-Fi, the router or the provider is slow, and why a call froze.
brew install seifip/kilobat/kilobat