Router · FRITZ! (formerly AVM)
FRITZ!Box login, restart, FRITZ!OS updates and UPnP
Manage your FRITZ!Box at http://fritz.box in a browser. Provider boxes may hide settings.
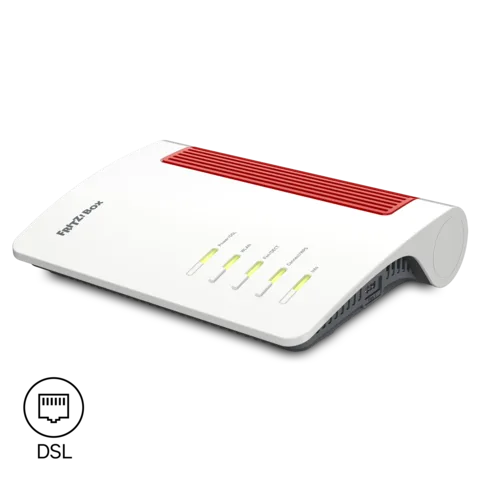
- Sign in
fritz.boxor192.168.178.1- App
- MyFRITZ!App (iOS and Android)
- Password
- Look for the FRITZ!Box password on the label underneath the box. The Wi-Fi key may be listed separately on the label.
- Models
- FRITZ!Box 7690, FRITZ!Box 7590 AX, FRITZ!Box 7590, FRITZ!Box 7530 AX, FRITZ!Box 5690 Pro, FRITZ!Box 5590 Fiber, FRITZ!Box 6690 Cable, FRITZ!Box 6660 Cable
Sign in to the FRITZ!Box
Connect your Mac to the FRITZ!Box by Wi-Fi or cable, but not through guest access.
Open
http://fritz.boxin your browser.If it doesn’t load, try
http://192.168.178.1or the fallback addresshttp://169.254.1.1.Enter the FRITZ!Box password and click Log In.
Forgot the password? Click Forgot your password?, then Send push service mail, if offered. Otherwise unplug for a minute, reconnect, and within 10 minutes choose Forgot your password? › Restore Factory Settings. This erases every setting.
Restart it properly
A restart keeps your settings but clears the event log, so read System › Event Log first if you are chasing a fault. It takes about two minutes.
Sign in at
http://fritz.boxand click System › Backup.Open the Restart tab.
Click the restart button and wait until the box is back.
Without the user interface
Unplug the FRITZ!Box from the power for 5 seconds.
Plug it back in and wait about two minutes.
Schedule a restart
FRITZ!’s help pages document no scheduled restart.
Update the firmware
Sign in and click System › Update.
Click Find New FRITZ!OS.
Click Next and follow the wizard, or click Start Update Now if that is offered.
On the Automatic Update tab, keep Notify me about new versions of FRITZ!OS and install new versions automatically on.
Automatic updates are on by default and roll out in stages, so an online update can get a new version sooner. If there is no Update menu, your provider supplied the box and installs FRITZ!OS for you.
See connected devices
Sign in and click Home Network › Mesh to see every active device and how it connects.
For a full list, click Home Network › Network and open the Network Connections tab.
Click the edit button next to a device to rename it or see its details.
Under Idle Connections, click delete next to devices you no longer own.
In MyFRITZ!App, the Home Network menu shows devices and lets you block or prioritise them.
Connect it to Kilobat
Kilobat Pro reads TR-064 on your home network. A FRITZ!Box provides its device list, whole-home traffic and uptime; it does not provide per-device traffic through this interface.
In System › FRITZ!Box Users, create a dedicated user with the FRITZ!Box Settings right and no access from the internet.
On the home network, open Kilobat’s Tools › Devices › Connect your router, choose FRITZ!Box and enter that user’s credentials.
Kilobat asks the box for its HTTPS port. Compare the certificate fingerprint with the box before choosing Trust and Connect.
The password stays in this Mac’s Keychain. Kilobat reads only; the remaining whole-home traffic is “other devices”, never a measured camera or other single device’s share. Connection details and limits.
UPnP and port forwarding
The FRITZ!Box supports UPnP IGD and PCP (Port Control Protocol). Port sharing via UPnP is allowed per device, not for the whole network, and it is off for each device until you turn it on.
Sign in and click Home Network › Network, then the Network Connections tab.
Click the edit button next to the device that needs open ports, such as a games console.
Open the Home Network tab.
Tick Permit independent port sharing and clearing and restoring the internet connection for this device.
Click Apply. Ports opened this way appear under Internet › Permit Access and Diagnostics › Security.
FRITZ! warns that once a device may open ports itself, malware on that device can too, bypassing the FRITZ!Box firewall. Allow it only on devices that need it, and keep their own firewall on. Port sharing also needs a public IPv4 or an IPv6 address from your provider.
Status information over UPnP
Separately, the FRITZ!Box can share read-only status over UPnP IGD: connection state, line sync and data transferred. FRITZ! marks Transmit status information over UPnP as recommended. Programs on your network can read it without a password.
Click Home Network › Network, then the Network Settings tab.
Click Change Advanced Network Settings and look for Transmit status information over UPnP.
Tick it and click Apply.
FRITZ!’s current help pages don’t name the exact tab for this option in FRITZ!OS 8.
NAT-PMP
FRITZ! documents UPnP IGD and PCP for automatic port sharing, not NAT-PMP.
Prioritise calls and gaming
FRITZ!OS prioritises calls automatically. Add rules for other traffic.
Click Home Network › Network, then the Network Connections tab.
Click the edit button next to the device.
In the Internet Use section, enable prioritized and click Apply.
Prioritisation rules
Click Internet › Filter, then the Prioritization tab.
Pick Real-Time Applications, Prioritized Applications or Background Applications, then Create New Rule.
Choose the device and the application, then click Add.
2.4 and 5 GHz, and the channel
By default the 2.4 and 5 GHz networks share one name, so the box can steer devices to the better band. Separate names switch that band steering off.
Sign in and click Wi-Fi › Wi-Fi Network.
Enable Use different names for Wi-Fi networks.
Enter a name for each band in Name of the Wi-Fi network (SSID).
Click Apply and reconnect your devices.
Change the channel
Click Wi-Fi › Wi-Fi Channel.
Turn off Set Wi-Fi channel settings automatically (recommended) to choose channels yourself.
Click Apply. Wi-Fi drops briefly and reconnects.
Even with a manual channel, the box moves away from strong interference and logs it in the event log.
Mesh: which node a device uses
FRITZ! Mesh joins repeaters, powerline adapters and other boxes under one Mesh Master.
Click Home Network › Mesh and check that each repeater shows the Mesh symbol.
In each repeater’s own interface, open Home Network › Mesh, then the Mesh Settings tab.
Enable Adopt settings enabled and click Apply.
Mesh Wi-Fi steering only works when both bands share one network name.
Guest network
Sign in and click Wi-Fi › Guest Access, then enable the guest access.
Choose Private Wi-Fi guest access for a password-protected network.
Set the name, the Encryption and a Network key of 8 to 63 characters.
Click Apply. Print Info Sheet gives a QR code for guests.
Mesh Repeaters carry the guest network automatically.
DNS settings
Sign in and click Internet › Account Information, then the DNS Server tab.
Enable Use other DNSv4 servers and fill in Preferred DNSv4 server and Alternative DNSv4 server.
Do the same under Use other DNSv6 servers if you use IPv6.
For encryption, enable Encrypted name resolution in the internet (DNS over TLS) and add the servers’ names.
Click Apply and confirm on the box if asked.
A wrong address cuts off internet access over that IP version.
DNS filter lists
FRITZ!OS 8.50 can block domains from filter lists for the home and guest networks.
Click Home Network › Network › Network Settings › Change Advanced Network Settings.
Open the DNS Filter tab and add a filter list by name and URL.
Connection status and logs
Click Internet › Online Monitor to see the connection and which devices use the most bandwidth.
Open the Connection Details tab to see your public IPv4 address (Internet, IPv4).
On a DSL model, click Internet › DSL Information and the DSL tab for Current data rate and error counters.
Click System › Event Log, then Internet Connection, for drops and sign-in errors.
An IPv4 address in 100.64.0.0–100.127.255.255 (carrier-grade NAT) or 192.0.0.0–192.0.0.7 (DS-Lite) means the box can’t be reached over IPv4 from outside.
Manuals and downloads
- FRITZ!Box 7690 manual (PDF)
- FRITZ!Box 7590 AX manual (PDF)
- FRITZ! Service: FRITZ!Box 7690
- FRITZ! Manuals
- Firmware downloads
Links go to the maker’s own pages.
Questions
My FRITZ!Box has no Update menu. Why?
Your provider supplied it and installs FRITZ!OS itself. Ask the provider about new versions.
A game says its NAT type is strict even with port sharing on. Why?
Open ports need a public IPv4 address. Check Internet › Online Monitor › Connection Details: a DS-Lite or carrier-grade NAT address means only your provider can change this.
Sources
- FRITZ! Knowledge Base: Opening the FRITZ!Box user interface
- FRITZ! Knowledge Base: Determining the password for the FRITZ!Box user interface
- FRITZ! Knowledge Base: Forgot password for the FRITZ!Box user interface
- FRITZ! Knowledge Base: FRITZ!Box user interface cannot be opened
- FRITZ! Knowledge Base: Loading the FRITZ!Box factory settings
- FRITZ! online help: System / Backup / Restart
- FRITZ! Knowledge Base: Updating FRITZ!OS of the FRITZ!Box
- FRITZ! Knowledge Base: Setting up automatic port sharing in the FRITZ!Box
- FRITZ! online help: UPnP (Transmit status information over UPnP)
- FRITZ! Development support: interfaces (TR-064 and UPnP IGD)
- FRITZ! Knowledge Base: Setting up MyFRITZ!App for iOS
- FRITZ! Knowledge Base: Prioritizing internet access for important network applications and devices
- FRITZ! Knowledge Base: Prioritize internet use for a device in the FRITZ!Box
- FRITZ! Knowledge Base: Changing the name of the Wi-Fi network (SSID)
- FRITZ! Knowledge Base: Optimizing the Wi-Fi network of the FRITZ!Box
- FRITZ! Knowledge Base: FRITZ!Box changes the Wi-Fi channel that was manually set
- FRITZ! Knowledge Base: What is Mesh Wi-Fi steering and how does it work?
- FRITZ! Knowledge Base: Setting up Wi-Fi guest access in the FRITZ!Box
- FRITZ! Knowledge Base: Configuring different DNS servers in the FRITZ!Box
- FRITZ! Knowledge Base: Configuring DNS filters in the FRITZ!Box
- FRITZ! Knowledge Base: Identifying the address range of the IPv4 address for the internet connection
- FRITZ! Knowledge Base: Internet access over the FRITZ!Box is slow
- FRITZ! Knowledge Base: DSL connection drops frequently
- FRITZ!: FRITZ!OS 8.50 release notes for the FRITZ!Box 7690
Checked on 1 November 2026.
See what your router can’t tell you
Kilobat is a Mac menu-bar app that watches the network from your side: which app is using it, whether the Wi-Fi, the router or the provider is slow, and why a call froze.
brew install seifip/kilobat/kilobat