Mesh system · TP-Link
TP-Link Deco login, restart, firmware and UPnP
Deco is TP-Link’s mesh Wi-Fi system. You set it up and manage it in the Deco app with a TP-Link ID. Many newer models also have a web page with extra settings.
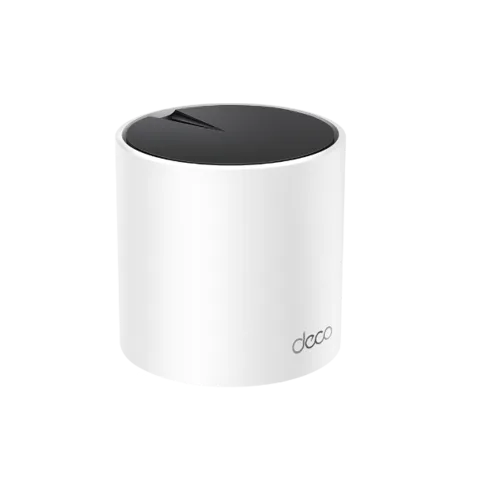
- Sign in
- The Deco app or
tplinkdeco.net - App
- The Deco app (iOS and Android)
- Password
- There is no separate admin password. You sign in to the app, and to the web page, with the TP-Link ID that set up the network (the owner account). The Wi-Fi password is not the login.
- Models
- Deco BE series (Deco 7), Deco XE75, Deco X50, Deco X55, Deco X20, Deco X60, Deco X90, Deco M4, Deco M5, Deco M9 Plus, Deco S4
Sign in to the TP-Link Deco
The app is the main way in. On supported models, tplinkdeco.net or 192.168.68.1 opens a web page with the same TP-Link ID.
Install the Deco app and sign in with your TP-Link ID.
For the web page, join the Deco network by Wi-Fi or Ethernet.
Type
tplinkdeco.netin the browser’s address bar. If it won’t load, use192.168.68.1.If the browser shows a privacy warning, click Advanced and continue. Deco uses a self-signed certificate.
Enter the owner account’s TP-Link ID password.
Only the owner account can use the web page; manager accounts can’t. If you changed the LAN address, find it under More › Advanced › LAN IP. Forgot the password? Tap Forgot Password? in the app. Pressing the reset button on the bottom for one second resets that Deco and erases its settings.
Restart it properly
Open the Deco app and go to the Network page.
Tap the network map, then the icon in the upper-right corner.
Tap Reboot Network to restart every Deco at once.
Restart one Deco
On the network map, tap the Deco you want to restart.
Tap the button in its top-right corner, then Reboot.
Unplugging a Deco and plugging it back in also reboots it. Remove on the same menu resets the unit instead.
Schedule a restart
Go to More › System › Reboot Schedule.
Turn on Reboot Schedule.
Set the time and choose daily or one day a week.
TP-Link added this to some models in firmware updates. If you don’t see it, update the Deco first.
Update the firmware
Open the Deco app and tap More › System › Update Deco.
The app shows whether each Deco is up to date.
If an update is offered, follow the on-screen steps to install it.
Wait about five minutes. A solid green or white light means it worked.
If an update fails, reboot the main Deco and move satellites closer, then try again. On models with the web page, you can upload a BIN file from TP-Link’s site under Advanced › System › Firmware Upgrade. Back up first if the release notes say the update resets settings.
See connected devices
Open the Deco app and go to the Network page.
Tap Online Clients to list every connected device.
Tap a device to rename it, set its type or give it high priority.
Tap a Deco on the network map to see only the clients connected to it.
UPnP and port forwarding
Deco supports UPnP. The switch is in the app.
Open the Deco app and tap More.
Go to Advanced › NAT Forwarding › UPnP.
Turn UPnP on or off.
UPnP lets any app on your network open ports without asking, and malware can use that too. TP-Link’s advice is to switch it off if you don’t need it and keep the firmware up to date. For a device that needs a fixed open port, forward it by hand under More › Advanced › NAT Forwarding instead.
NAT-PMP
TP-Link’s Deco help pages don’t mention NAT-PMP. UPnP is the only automatic port-opening switch.
Prioritise calls and gaming
Deco QoS lives in the app, and it differs by model. HomeShield models have Scene Acceleration and Client Acceleration; older HomeCare models have a High Priority Mode.
Open the Deco app and go to More › QoS, then turn it on.
For activities, choose Scene Acceleration, enter your Total Bandwidth and pick scenes such as gaming.
For devices, choose Client Acceleration, tap Add Clients and save.
Tap Always next to a device to limit how long it stays prioritised.
2.4 and 5 GHz, and the channel
On Deco, 2.4 GHz and 5 GHz always share one Wi-Fi name and password, and TP-Link says they can’t be separated. On models with 6 GHz, that band can have its own name.
If a device needs one band only, open the Deco app and go to More › Guest Network.
Turn on the guest network, tap Advanced and choose the 2.4 GHz or 5 GHz band.
Connect that device to the guest network.
Change the channel
Some Deco models let you set the channel by hand.
Connect your phone to the Deco Wi-Fi and open the Deco app.
Tap More › Wi-Fi Settings › 2.4G & 5G Wireless Network › Advanced.
Tap 2.4GHz Network or 5GHz Network, choose a channel and width, then tap Apply.
If your model doesn’t show these options, it picks channels itself.
Mesh: which node a device uses
Deco units form the mesh themselves and route traffic along the fastest path. TP-Link recommends up to six units for most models. Deco only meshes with other Decos.
Open the network map in the Deco app to see each unit and how it connects.
To fix a satellite to one source, tap it, then Specified Connection.
Turn off Auto, pick the source Deco and tap Save.
To fix a device to one Deco, tap Online Clients, choose the device and use the same option.
TP-Link also calls this Connection Preference. It is only on some models, and every Deco in the network must support it.
Guest network
Open the Deco app and go to More › Guest Network.
Tap Turn On Guest Network, set a password and tap Done.
Change the name, Security or Duration if you like, then tap Save.
Tap Share Wi-Fi to send the details to a guest.
In Router mode the guest network is always cut off from your main network. In Access Point mode, the Allow Local Access switch under Advanced controls this. With Duration on Auto, it turns off after about 10 minutes with no guests.
DNS settings
Your phone must be on the Deco Wi-Fi, signed in as the owner, with the Deco in Router mode.
Open the Deco app and tap More › Internet Connection › Internet Settings.
Tap DNS Address and choose Manual.
Enter a primary and secondary DNS server, then tap Save.
Tap Save again. No restart is needed.
If your model won’t let you change the internet-side DNS, set it under More › Advanced › DHCP Server instead.
Connection status and logs
The Network page in the app shows whether each Deco and device is online, and runs a speed test.
On models with the web page, sign in at
tplinkdeco.netand go to Advanced › System › System Log.Set the log type to ALL and click SAVE TO LOCAL.
The app can’t export the log to you. It only attaches it to a support email: open the menu, tap Support Center, then Email Us and tick Add System Logs.
Manuals and downloads
Links go to the maker’s own pages.
Questions
Can I give 2.4 GHz and 5 GHz different names on Deco?
No. TP-Link says these bands share one name and password because of how the mesh works. Use a single-band guest network for devices that need 2.4 GHz.
Why can’t I sign in to tplinkdeco.net?
Only the owner TP-Link ID works, and only on models that support the web page. Manager accounts and the Wi-Fi password won’t work.
Sources
- TP-Link Support: How to Log In to Your TP-Link Deco Web Management Page
- TP-Link Support: How to Reset Deco: Reset or Reboot Your Deco Whole-Home Wi-Fi System
- TP-Link Support: How to configure the Reboot Schedule feature on the Deco
- TP-Link Support: How to update Deco firmware (3 methods)
- TP-Link Support: Deco App Overview: Features, Setup, and Settings
- TP-Link Support: TP-Link UPnP: What It Is and How to Enable It
- TP-Link Support: TP-Link Deco QoS Settings: Setup Guide
- TP-Link Support: TP-Link Deco Mesh Wi-Fi: Common Questions Answered
- TP-Link Support: How to Change the Wi-Fi Channel on Your TP-Link Deco
- TP-Link Support: Deco Specified Connection: Select Your Signal Source
- TP-Link Support: How to Set Up a Guest Network on TP-Link Deco
- TP-Link Support: How to Change DNS Settings on Your TP-Link Deco
- TP-Link Support: How to Get Deco System Log
- TP-Link Support: How to collect the system log of the Deco app
Checked on 1 November 2026.
See what your router can’t tell you
Kilobat is a Mac menu-bar app that watches the network from your side: which app is using it, whether the Wi-Fi, the router or the provider is slow, and why a call froze.
brew install seifip/kilobat/kilobat