Router · Synology
Synology Router login, restart, SRM updates and UPnP
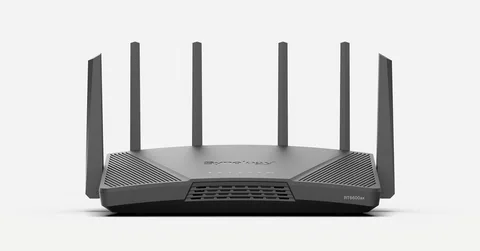
Synology Routers such as the RT6600ax and WRX560 run Synology Router Manager (SRM). You manage them in a browser at router.synology.com, or with the DS router app on your phone.
- Sign in
router.synology.comor192.168.1.1:8000- App
- DS router (iOS and Android)
- Password
- There is no factory admin account: the setup wizard asks you to create a username and password, and won’t accept common names such as
admin. The setup Wi-Fi name,Synology_plus the last six digits of the serial number, is on the back label with a QR code. - Models
- RT6600ax, WRX560, RT2600ac, MR2200ac
Sign in to the Synology Router
Factory default. Synology gives the setup Wi-Fi password as synology. The wizard has you set your own Wi-Fi name and password; do that before you use the network.
Connect your Mac to a LAN port, or to the router’s Wi-Fi.
Open
router.synology.com, or the router’s address with port 8000, such ashttp://192.168.1.1:8000.The first time, follow the wizard to create an administrator account, Wi-Fi and internet connection.
Afterwards, enter your username and password and click Sign in.
router.synology.com won’t work if your Mac uses its own DNS server, such as 8.8.8.8; use the IP address instead. Forgotten the password? Hold the reset button for 4 seconds for a soft reset. That resets the admin login and the network, Wi-Fi and firewall settings, but keeps other users and files.
Restart it properly
Sign in to SRM.
Click Options on the taskbar at the top.
Choose Restart and confirm.
Holding the reset button for 10 seconds is a hard reset: it erases all settings and you reinstall SRM.
Schedule a restart
Go to Control Panel › Device › Reboot Schedule.
Tick Enable schedule.
Choose days of the week, or dates with an optional monthly repeat, and a time.
Click Apply.
Restart one Wi-Fi point
Go to Wi-Fi Connect › Wi-Fi Point and select the Wi-Fi point.
Click Manage › Restart now.
Update the firmware
Go to Control Panel › System › Update & Restore.
If a newer SRM is listed, click Download, then Update now in the notification.
To install automatically, click Update settings, tick Check for SRM updates automatically and set a schedule.
Or download the
.patfile from the Download Center and click Manual SRM Update.
The router restarts by itself when the update finishes. In Update settings, Important updates only limits you to security fixes.
See connected devices
Go to Network Center › Status and click Device List.
It shows each device’s name, wired or wireless connection, and live traffic.
For Wi-Fi detail, go to Wi-Fi Connect › Wi-Fi Client to see SSID, band, IP and MAC.
To fix a device’s address, go to Network Center › Local Network › DHCP Client and click Add to Address Reservation.
To block a device, use Ban in Network Center › Traffic Control. A banned device can still reach your local network, but not the internet or SRM.
UPnP and port forwarding
UPnP is set per local network, and is how a Synology NAS behind the router opens its own ports.
Go to Network Center › Local Network › Network.
Select the local network your device is on and click Edit.
Open the Advanced tab and tick Enable UPnP.
Click OK. UPnP Client List on the same tab shows the current clients.
With UPnP on, any device on that network can open ports to the internet by itself, including malware. Enable it only on the network that needs it, not on the guest network. Firewall rules override port forwarding, which overrides UPnP rules.
Port forwarding
Go to Network Center › Port Forwarding › Port Forwarding and click Create.
Enter a name, the device’s private IP, the public and private ports, and TCP or UDP.
Click Create.
Port triggering, on the next tab, opens ports only for a short time and is safer.
NAT-PMP
Synology’s SRM help doesn’t mention NAT-PMP.
Prioritise calls and gaming
Traffic Control can give up to three devices high priority, set guaranteed and maximum speeds, or ban devices.
Go to Network Center › Traffic Control › Advanced and click Settings.
Tick Enable traffic control, enter your internet upload and download speeds, and click OK.
On the General tab, click Add to bring in your Mac.
Click its priority icon and set it to high.
Speeds are in KB/s. Keep the total guaranteed bandwidth below your actual internet speed or rules may not work.
2.4 and 5 GHz, and the channel
By default Smart Connect puts 2.4 and 5 GHz under one name and steers devices between them.
Go to Wi-Fi Connect › Wi-Fi Settings › Wi-Fi Network.
Select the network, click the menu icon and choose Edit.
Turn off Smart Connect and give 2.4 GHz and 5 GHz their own names.
Click Apply.
Change the channel
Go to Wi-Fi Connect › Wi-Fi Settings › Radio.
Under each band, choose a Channel and, if needed, a Channel width.
Apply the changes.
Synology recommends leaving the channel on auto.
Mesh: which node a device uses
Synology Routers form a mesh with other Synology Routers, called Wi-Fi points, over Ethernet or Wi-Fi.
On the main router, go to Wi-Fi Connect › Wi-Fi Point and click Add.
Choose wireless or Ethernet uplinks, power on the new point, and wait for its light to blink.
When the scan finds it, name it and click Next.
Afterwards, select a point and click Details to see its bands and Wi-Fi clients.
The map shows Ethernet links as solid lines and wireless links as dotted. Under Manage › Select Uplink Type you can force Ethernet only.
Guest network
SRM has a guest network built in. It is wireless only and kept apart from your private networks.
Go to Wi-Fi Connect › Wi-Fi Settings › Wi-Fi Network.
Select the guest network and click Edit.
Tick Enable wireless radio, set a name, security level and password.
Click Apply.
Under Wi-Fi schedule you can turn the guest Wi-Fi off at set times. The guest network can be turned off but not deleted.
DNS settings
For the router itself, go to Network Center › Internet › Connection.
Under Manually Configure DNS Server, enter a preferred and an alternative server.
For encrypted DNS, go to Network Center › Local Network › Network › Advanced Settings.
Tick Enable DoH (DNS over HTTPS) and choose Cloudflare or Google, or enter your own URL.
To hand devices a different DNS server, edit the network’s IPv4 DHCP tab and set Primary DNS. DoH isn’t available if the DNS Server package is installed.
Connection status and logs
Go to Network Center › Status for the internet IP address, gateway and DNS.
Click Internet for live upload and download, or Port Status for link speeds.
Wi-Fi Connect › Status shows each band’s rate and 12 hours of Wi-Fi logs.
Open Log Center from the main menu for the system log.
For traffic history, go to Network Center › Traffic Control › Monitor, click Settings and tick Record traffic statistics.
Manuals and downloads
Links go to the maker’s own pages.
Questions
What is the default Synology Router login?
There isn’t one. You create the administrator account in the setup wizard at router.synology.com. If you lose it, a 4-second press of the reset button lets you create a new one.
Why can’t I sign in from the guest network?
By default SRM can only be managed from the primary network. Connect to the main Wi-Fi or a LAN port.
Sources
- Synology Knowledge Center: Navigate Desktop (SRM 1.3)
- Synology Knowledge Center: How do I set up my Synology Router?
- Synology Knowledge Center: How do I reset my Synology Router?
- Synology Knowledge Center: Reboot Schedule
- Synology Knowledge Center: Update & Restore
- Synology Knowledge Center: Network Center Status
- Synology Knowledge Center: Wi-Fi Client
- Synology Knowledge Center: Network & DHCP
- Synology Knowledge Center: Port Forwarding
- Synology Knowledge Center: Traffic Control General
- Synology Knowledge Center: Traffic Control Advanced
- Synology Knowledge Center: Wi-Fi Network
- Synology Knowledge Center: Radio
- Synology Knowledge Center: Wi-Fi Point
- Synology Knowledge Center: Internet Connection
- Synology Knowledge Center: Wi-Fi Status
- Synology Knowledge Center: Traffic Monitor
Checked on 1 November 2026.
See what your router can’t tell you
Kilobat is a Mac menu-bar app that watches the network from your side: which app is using it, whether the Wi-Fi, the router or the provider is slow, and why a call froze.
brew install seifip/kilobat/kilobat