Router · NETGEAR
NETGEAR Nighthawk login, restart, firmware and UPnP
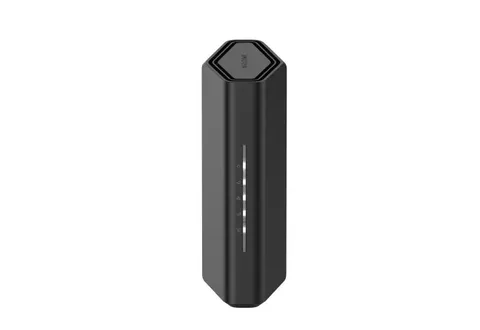
Nighthawk is NETGEAR’s range of retail Wi-Fi routers. You manage them in a browser at routerlogin.net, or in the Nighthawk app on a phone.
- Sign in
www.routerlogin.netor192.168.1.1- App
- The Nighthawk app (iOS and Android)
- Password
- The user name is
admin. The password is the one you chose when you set the router up. The label on the router shows the login details, Wi-Fi name and Wi-Fi password. - Models
- Nighthawk WiFi 7 (RS series), Nighthawk WiFi 6E (RAXE series), Nighthawk WiFi 6 (RAX series), Nighthawk AC (R7000, R8000 and others), Nighthawk Pro Gaming (XR series)
Sign in to the NETGEAR Nighthawk
Factory default. NETGEAR’s factory default is user name admin and password password. Newer routers make you change it during setup; on an older one, change it under ADVANCED › Administration › Set Password.
Connect your Mac to the router by Wi-Fi or Ethernet.
Open
http://www.routerlogin.netin a browser.http://www.routerlogin.comorhttp://192.168.1.1also work.Enter
adminand the router password. Both are case-sensitive.
The admin password is not your Wi-Fi password or your NETGEAR account. If you turned on Enable Password Reset, click Cancel at the login prompt, enter the serial number from the label and answer your security questions. Otherwise, hold the Reset button on the back for at least 10 seconds; this erases all settings.
Restart it properly
Sign in at
routerlogin.net.Select the ADVANCED tab.
Click Reboot, then OK.
A reboot keeps all your settings and takes up to two minutes. On Nighthawk Pro Gaming routers, click the three dots at the top right, then Reboot. Without the app or browser, press the Power On/Off button on the back, wait 30 seconds and press it again.
Restart from the Nighthawk app
Open the Nighthawk app and tap the home icon at the top left.
Tap REBOOT, then confirm with Reboot.
Schedule a restart
NETGEAR’s Nighthawk manuals describe no scheduled restart.
Update the firmware
Current Nighthawk routers update themselves by default. You can also check by hand.
Sign in at
routerlogin.net, ideally over Ethernet.Go to ADVANCED › Administration › Router Update. Some models call it Firmware Update.
Click Check, then Update if new firmware is found.
Leave Router Auto Firmware Update set to Enable and click Apply.
Don’t close the page or turn the router off during an update; it restarts by itself. To install a specific version, download it from NETGEAR and use the Manual Update tab.
Update from the Nighthawk app
Connect your phone to the router’s Wi-Fi and open the Nighthawk app.
Tap the image of your router, scroll down and tap CHECK FOR UPDATES.
If new firmware is available, tap UPDATE.
See connected devices
Sign in at
routerlogin.net.On the BASIC tab, select Attached Devices.
Read each device’s connection type (wired or Wi-Fi band), name, IP address and MAC address.
To rename a device, tick it, click Edit, change the name and click Apply.
Phones and laptops that use a private Wi-Fi address can show a different MAC address after time away. Renaming only changes how a device is listed.
UPnP and port forwarding
Nighthawk routers support UPnP, and it is on by default.
Sign in and go to ADVANCED › Advanced Setup › UPnP.
Tick or clear Turn UPnP On, then click Apply.
Check the UPnP Portmap Table to see which devices opened which ports. Click Refresh to update it.
With UPnP off, no device can open ports on the router by itself. That is safer, but some games and calls may need ports forwarded by hand. The Portmap Table is the place to spot a device opening ports you didn’t expect.
NAT-PMP
NETGEAR’s manuals don’t mention NAT-PMP, and there is no setting for it.
Port forwarding instead
Go to ADVANCED › Advanced Setup › Port Forwarding / Port Triggering to open a port for one device by hand.
Prioritise calls and gaming
Many Wi-Fi 6 Nighthawk routers, such as the RAX50, have Dynamic QoS. The WiFi 7 RS300 manual has no QoS page, so check your model’s manual.
Sign in and select QoS on the BASIC tab.
Tick Enable QoS. It is off by default.
Choose Let Speedtest detect my Internet bandwidth and click Take a Speedtest, or enter your plan’s speeds.
Click Apply.
Run the speed test while nothing else is using the internet. Dynamic QoS relies on an application database that the router keeps up to date by itself.
2.4 and 5 GHz, and the channel
Smart Connect is on by default: 2.4, 5 and 6 GHz share one Wi-Fi name and password, and the router picks the band.
Sign in and select Wireless on the BASIC tab.
Clear Enable Smart Connect to give each band its own name and password.
Set a name for the 2.4 GHz network, then click Apply.
If you turn Smart Connect back on and the bands don’t match, the 2.4 GHz name and password overwrite the others.
Change the channel
On the Wireless page, find the section for the band.
Pick a number from the Channel menu, then click Apply.
NETGEAR advises changing the channel only if you see dropouts or slow transfers. For 6 GHz, choose a channel marked PSC so all devices can find it. The change also applies to the guest network.
Mesh: which node a device uses
A Nighthawk router is a single router, and its manuals describe no mesh system of its own. NETGEAR’s mesh range is Orbi. A Nighthawk can also run as a plain Wi-Fi access point under ADVANCED › Advanced Setup › Router / AP Mode.
Guest network
Sign in and select Guest Network on the BASIC tab.
Tick Enable Guest Network for each band you want.
Change the name from
NETGEAR-Guestif you like, and pick WPA2 or WPA3 security.Type a password in Password (Network Key), then click Apply.
Guests can’t reach your own devices unless you tick Allow guests to see each other and access my local network. Choosing None makes an open network anyone can join.
DNS settings
Sign in and select Internet on the BASIC tab.
Under Domain Name Server (DNS) Address, select Use These DNS Servers.
Enter a primary DNS address, and a secondary one if you have it.
Click Apply, then Test to check the connection.
To go back to your provider’s servers, select Get Automatically from ISP.
Connection status and logs
Sign in and select the ADVANCED tab.
In the Internet Port pane, click Connection Status for the WAN IP, gateway, DNS servers and lease times.
Click Renew to restart the internet connection if needed.
For the event log, go to ADVANCED › Administration › Logs.
The router keeps up to 256 log entries. Send Log emails them once email notifications are set up.
Manuals and downloads
- NETGEAR RS300 user manual (PDF)
- NETGEAR RAX50 user manual (PDF)
- NETGEAR RS300 support
- Firmware downloads
Links go to the maker’s own pages.
Questions
Why does routerlogin.net not load?
It only works from a device connected to the Nighthawk. Try http://192.168.1.1, or join the router by Ethernet.
Do I need the Nighthawk app?
No. Everything in this guide works in a browser. The app adds remote management, Armor and Smart Parental Controls.
Sources
- NETGEAR Support: How do I reboot my NETGEAR router using the router web interface?
- NETGEAR Support: How do I power cycle or reboot my NETGEAR router?
- NETGEAR Support: How do I change the admin password on my NETGEAR router?
- NETGEAR Support: What are the default user interface passwords for NETGEAR devices?
- NETGEAR Support: How do I update the firmware on my NETGEAR router?
- NETGEAR Support: How do I update the firmware on my NETGEAR router with a web browser?
- NETGEAR: Nighthawk WiFi 7 Tri-Band Router RS300, RS280, BE9300 User Manual (PDF)
- NETGEAR: Nighthawk AX6 RAX50 User Manual (PDF)
Checked on 1 November 2026.
See what your router can’t tell you
Kilobat is a Mac menu-bar app that watches the network from your side: which app is using it, whether the Wi-Fi, the router or the provider is slow, and why a call froze.
brew install seifip/kilobat/kilobat